Results 1 to 10 of 10
Thread: New Radio Rack
-
07-21-2007, 02:17 PM #1
New Radio Rack
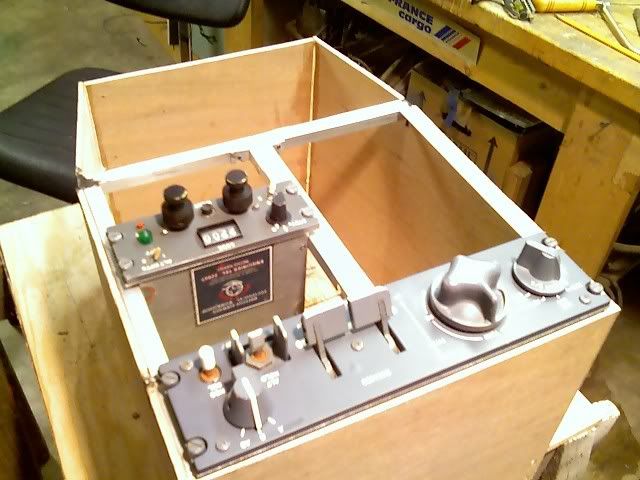
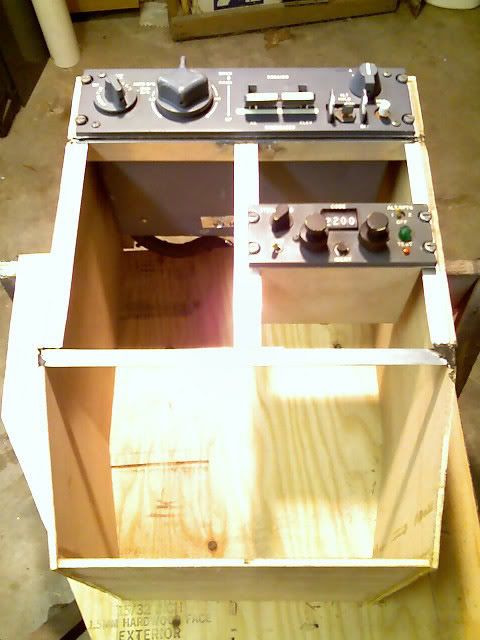
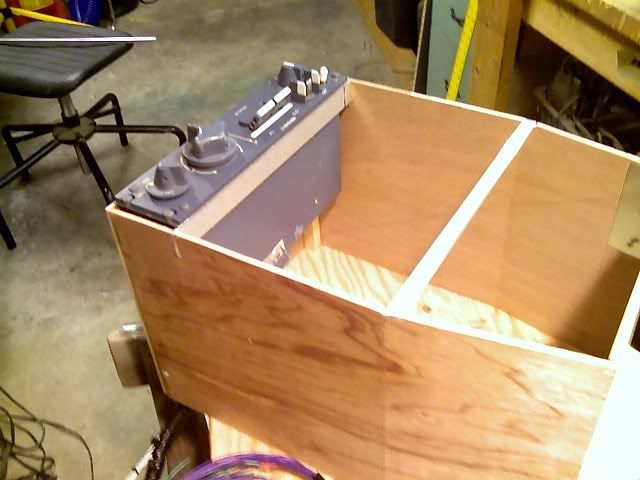
Ended up having to build a new radio rack for the center control stand. I thought the old one would fit the new auto-pilot, but I forgot about the thickness of the wood, and the new AP has a chassis case where as the old one didn't.
Well, I got the correct angles on this one at the rear, and everything will fit now.
 Boeing Skunk Works
Remember...140, 250, and REALLY FAST!
We don't need no stinkin' ETOPS!

Powered by FS9 & BOEING
-
07-25-2007, 07:00 AM #2
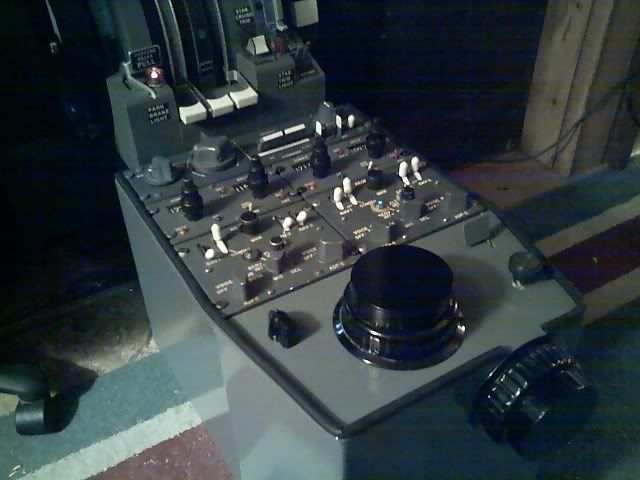
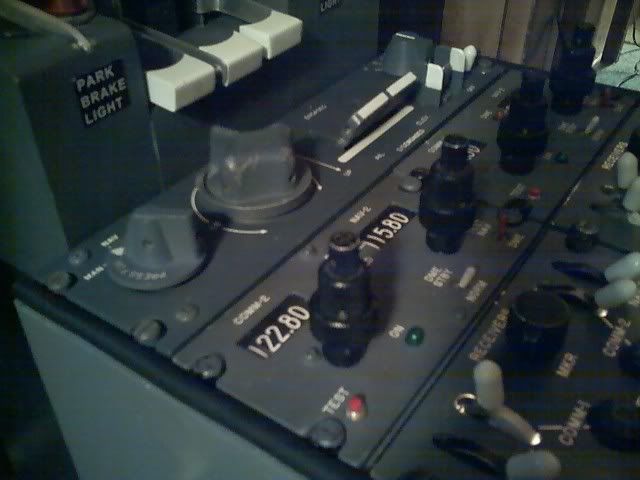
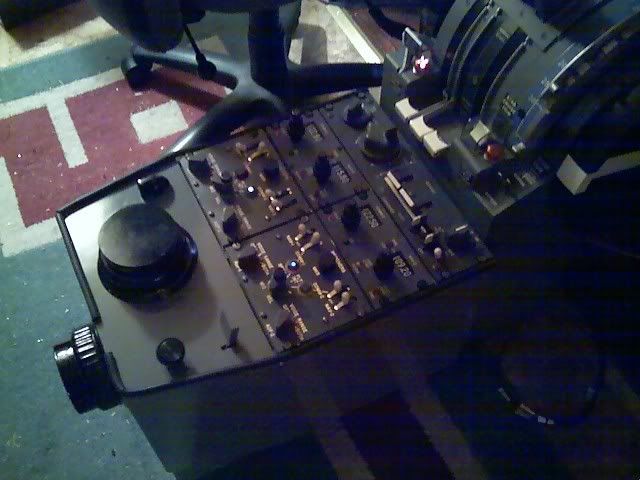
Here is the finished radio rack for the control stand:
 Boeing Skunk Works
Remember...140, 250, and REALLY FAST!
We don't need no stinkin' ETOPS!

Powered by FS9 & BOEING
-
07-25-2007, 08:59 AM #3
Michael,
That looks amazing. I always worry that wood will not look correct, but it appears in the photo that your rack has been painted in such a way to not ever know it's wood. Looks great!
-
07-25-2007, 09:01 AM #4
That is excellent work Mike, truly awesome. Love the switch caps, where did you get them? lol
Gwyn
737NG using Prosim737, Immersive Calibration Pro, Aerosim Solutions motorized TQ & cockpit hardware, CP Flight MCP & FDS SYS1X, SYS2X & SYS4X, FDS PRO FMCs, AFDS units & Glarewings, Matrix Orbital ELEC display, Pokeys Landing & Cruise alt display, Buttkicker Gamers, 3 x BenqMW811ST projectors with a Matrox Th2Go
http://www.aerosimsolutions.com.au
Supporter of MyCockpit.org, please join me in donating!!!
-
07-25-2007, 01:58 PM #525+ Posting Member

- Join Date
- Mar 2007
- Location
- Sweden
- Posts
- 35
Amazing jobb, a work done by a truly skilled craftsman, hmmm hope a spelled that right.
What goes up, must come down, one way or the other.
Safe landings
Martin
http://www.freewebs.com/boeing737ng/
-
07-25-2007, 04:01 PM #675+ Posting Member

- Join Date
- Dec 2006
- Location
- Israel
- Posts
- 126
Realy cool
Great job
-
07-25-2007, 06:56 PM #7
Thanks guys. I was beginning to think everyone was on vacation.
The secret to using wood to build with that will eventually be painted, is to use a body glaze to seal the woodgrain and fill in all imperfections and pinholes.
I learned this trick a long time ago when I used to build Star Trek Constitution-Class command cons (Captain Kirk's chair.)
After sanding off the first coat (wear a mask even if the orbital sander is supposed to suck up the dust), hit with a light coat of primer and find and fill the imperfections. Sand it again and check a second time. If you're good to go after the second coat of glaze, hit it with a green etching primer, sand with 600 grit and apply your final coat.
In this case my entire sim is painted in Krylon Rust-Tough Gloss Battleship Gray. I forget the number, but I have to order this as no one carries it locally.
If you take your time and use the body glaze you would never know it's made out of wood. It seals and fills to perfection. You get an absolutely smooth and glass like finish coat.
Thanks for the replies...and yeah, those switch caps look pretty darn good on 30 year old Collins parts! Boeing Skunk Works
Remember...140, 250, and REALLY FAST!
We don't need no stinkin' ETOPS!

Powered by FS9 & BOEING
-
07-26-2007, 05:36 AM #8
Can you get those tuners to interface Mike?

737NG using Prosim737, Immersive Calibration Pro, Aerosim Solutions motorized TQ & cockpit hardware, CP Flight MCP & FDS SYS1X, SYS2X & SYS4X, FDS PRO FMCs, AFDS units & Glarewings, Matrix Orbital ELEC display, Pokeys Landing & Cruise alt display, Buttkicker Gamers, 3 x BenqMW811ST projectors with a Matrox Th2Go
http://www.aerosimsolutions.com.au
Supporter of MyCockpit.org, please join me in donating!!!
-
07-26-2007, 10:01 AM #9
I've considered it, and because they are only rotary switches I don't see why I couldn't get them to work in the sim. I haven't tried anything with them yet, but if they behave like any other normal rotary switch it should work.
I would have to set the frequencies on the default FS frequencies before shuting down the sim so the radio freqencies on the heads would match those in FS upon the next startup.
FSUIPC has the facilities for programming the knobs.
It's a bit farther down on the list at this point. I'd really like to keep these radio heads if I can get them working, but the digital solution from several manufacturers has some appeal as well. The newer radio heads are rather plain looking thoughBoeing Skunk Works
Remember...140, 250, and REALLY FAST!
We don't need no stinkin' ETOPS!

Powered by FS9 & BOEING
-
07-26-2007, 03:12 PM #10
Your radio-rack is beatyful. Very well done

Similar Threads
-
Choices: Saitek radio panel or GoFlight Radio Panel...
By Tim Abbott in forum General Aviation (GA) Builder DisccusionReplies: 6Last Post: 09-08-2010, 01:43 AM -
Generic rack rails and GoFlight modules
By headshrink in forum General Builder Questions All Aircraft TypesReplies: 0Last Post: 08-25-2009, 05:59 PM -
B-737 Fire Rack for the Pedestal
By Michael Carter in forum My Cockpit UpdateReplies: 5Last Post: 11-28-2007, 11:06 PM -
727 Glareshield Rack Restored
By Michael Carter in forum My Cockpit UpdateReplies: 42Last Post: 04-09-2007, 09:58 AM -
Glareshield rack arrives...
By Michael Carter in forum My Cockpit UpdateReplies: 4Last Post: 03-31-2007, 09:29 AM


 Reply With Quote


Search Womans from your town for night
HDG preselect function